Unit plans · Design
Strawbots
DesignGrade 711 lessons
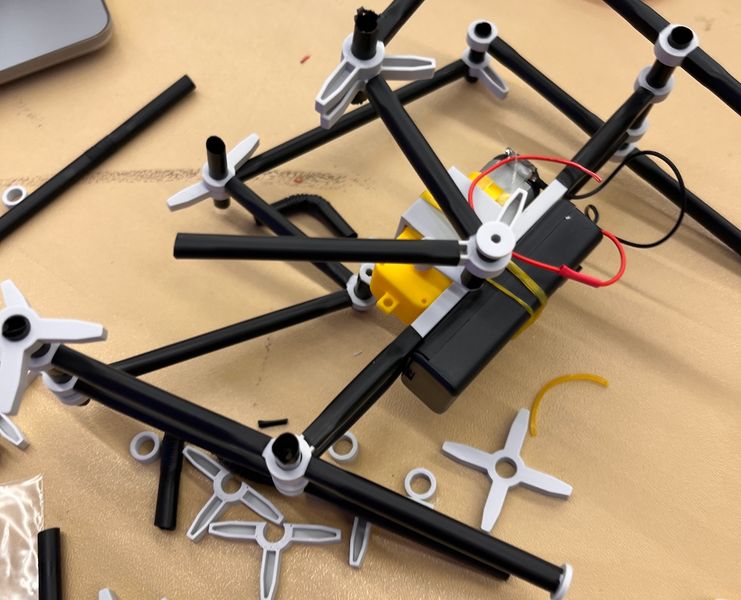
Students design and build strawbots, simple robots made from DC motors, straws, and 3D-printed parts. The unit begins with exploring joints in the natural world and on their own bodies, then students build an initial strawbot prototype using straws. They test their designs in races to see how well they work.
Building on this experience, students design an advanced version, specifying improvements they want to make. They learn orthographic drawing to plan a custom 3D-printed part that will replace or improve part of their straw structure. Using Tinkercad, they model and print their piece, then assemble it into their final strawbot. The unit concludes with testing and evaluating how their design changes affected performance.
The lessons
1
Joints in the Real World
45 min · 5 activities
Lesson shape
Opening5 minMini-lesson10 minWork time25 minDebrief5 min- OpeningReading7 min
What is a Joint?
Before you research, make sure you know exactly what you are looking for — joints are everywhere, and they come in more forms than you might expect.
Read the three cards below. They introduce the key ideas you will use during today's research.
- Natural joints: Living things use joints to allow movement or to hold structure together — for example, the knee, the shoulder socket, or the way a tree branch meets a trunk.
- Man-made joints: Engineers and designers create joints to fasten materials — for example, a hinge on a door, a bolt through a frame, or a weld on a metal structure.
- Why joints matter in Strawbots: Your Strawbots structure will stand or fall at its joints. Understanding how real joints work gives you better ideas for designing your own.
Look for: You can explain in your own words what a joint is and name one natural and one man-made example.
- OpeningExample sort6 min
Joint or Not? Warm-up Sort
Sort each item into the correct column: Natural Joint, Man-made Joint, or Not a Joint.
Look for: All items are correctly placed and you can explain what makes something a joint.
- Work timeImage annotate20 min
Joint Image Collection & Annotation
Collecting images is only the start — annotating them forces you to look closely and explain what you see, which is where the real learning happens.
- Find at least four images of joints: at least TWO natural joints (e.g. in animals or plants) and at least TWO man-made joints (e.g. in buildings, machines, or furniture).
- Upload each image.
- Drop a numbered pin on the exact point of the joint.
- Write a note for each pin using this structure:
- Name of the joint (if known)
- Natural or man-made?
- What does it connect?
- What movement (if any) does it allow?
Look for: You have uploaded at least four images (2 natural, 2 man-made), each with at least one placed pin and a note covering all five points.
- Work timeQuestion steps8 min
Joints Research Questions
Now that you have collected and annotated your images, take what you have learned and put it into your own words — this is where research turns into understanding.
Answer each question using what you found during your research.
- What is a joint? Write your own definition in one or two sentences.
- Describe ONE natural joint from your research. What does it connect, and what type of movement does it allow?
- Describe ONE man-made joint from your research. What materials does it join, and why is that joint type a good choice for that job?
- What is one similarity between a natural joint and a man-made joint that you found? What does that tell you about good joint design?
- Which joint from your research would be most useful as inspiration for your Strawbot structure? Explain why.
Look for: Each answer is written in full sentences, uses at least one specific example from your images, and goes beyond a one-word reply.
- DebriefReflection4 min
Lesson Reflection: Joints Research
Taking two minutes to reflect on what you found and what surprised you helps lock the learning in — and gives you something to build on next lesson.
Answer the three reflection prompts honestly. There are no wrong answers here — your genuine thinking is what matters.
- What are you most confident about?
- What are you still unsure about?
- Where could you use this?
Look for: You have responded to all three prompts with at least one specific thing from today's research (a joint name, an image, an idea) — not just 'I learned a lot'.
2
Playing with Joints
45 min · 6 activities
Lesson shape
Opening5 minMini-lesson10 minWork time25 minDebrief5 min- OpeningReading6 min
What Makes a Joint?
Before you start building, make sure you know exactly what a joint is — and why it matters in a moving structure.
Read the three cards below. As you read, think about the straws and connectors on your table — which type of joint do you think they could make?
- Rigid joint: Locks two parts together so they cannot move relative to each other. The joint transfers force without any rotation or flex.
- Pivot joint: Allows rotation around a single point. One part can swing or spin while the other stays still.
- Flexible joint: Allows some movement in multiple directions — a small range of bend or twist. Common in linkages and soft structures.
Look for: You can name the three joint types and give one example of where you would see each one in everyday life.
- OpeningExample sort6 min
Joint or Not a Joint?
Sharp makers notice exactly where a joint is — and where it isn't. Sort these examples before you start building.
Click each item, then click the column where it belongs. You will get instant feedback on each placement.
Look for: All six items are sorted correctly, and you can say in one sentence why you placed the tricky ones where you did.
- Work timeQuestion steps8 min
Investigate Your Joints
Good designers study their materials before committing to a build — a few minutes of testing now saves a lot of ripping apart later.
Using the straws and connectors on your table, test at least two different ways of joining straws before you start your strawbot. Then answer the questions below.
- What two joining methods did you test? Describe each one briefly.
- Which joint felt stronger? What did you do to test this?
- Which joint allows the most movement? Is that useful or a problem for your strawbot?
Look for: Three answered prompts with specific observations from your physical tests — not guesses, but things you actually tried and noticed.
- Work timePhoto or file upload18 min
Build & Document Your Strawbot
Now it is time to build — use what you discovered about joints to make a basic strawbot that can stand on its own.
Build your strawbot using straws and at least one type of joint you tested. Your strawbot must stand up on its own without support.
When you are happy with it:
- Take at least two clear photos of your finished strawbot from different angles.
- Upload your best photo here.
Keep your strawbot safe — you will annotate it in the next step.
Look for: A clear photo of a standing strawbot uploaded, showing at least one identifiable joint. The strawbot holds its own weight without being held.
- Work timeImage annotate10 min
Annotate Your Strawbot
Taking a photo is only the start — annotating forces you to look closely and explain the decisions you made while building.
Upload your strawbot photo (or use the one you just took). Drop at least three numbered pins onto different parts of your strawbot. For each pin, write a note that answers: What is this part? What type of joint is it, or what structural role does it play? Why did you make it this way?
Aim for pins on: a joint, a structural part (leg, frame), and one thing you would change if you built it again.
Look for: Three or more pins placed on specific parts of the photo, each with a note that names the part, identifies its joint type or function, and gives a reason for the design choice.
- DebriefQuestion steps7 min
Document Your Process
Now that you have built and annotated your strawbot, take what you learned and put it into words — this is your making record.
Answer the three questions below. Write in full sentences. Your answers will form part of your design documentation.
- Which joint in your strawbot worked best, and what evidence from your build supports that?
- What was the biggest challenge you faced while building, and how did you respond to it?
- If you had 10 more minutes and the same materials, what one change would you make and why?
Look for: Three answered questions, each with specific evidence or a named example from your own build — not general statements, but things that happened in your session today.
3
Design your advanced StrawbotAssessment
30 min · 5 activities
- The brief
Your task
You've researched how joints work, built a basic strawbot, and seen what it can and can't do. Now you're the designer. Your job is to design a concept for a better, more advanced strawbot — one that fixes a real problem you saw in your own build.
Start from a real problem. Think back to your basic strawbot in Lesson 2. What did it do badly? Did it fall over? Did the legs slip? Did it only shuffle instead of walk? Was it too slow? Pick the ONE problem you most want to fix — this is what your whole design has to solve.
What you will produce:
-
A design specification — the success criteria your advanced version must meet (what a good solution to your problem looks like).
-
A range of design ideas (at least 3 different sketches) — each one a different attempt at solving your problem. Annotate them so someone else can understand how they work.
-
A chosen design — pick your best idea, add detail, and justify why you chose it over the others.
Command terms:
-
Design — produce a plan, drawing or model to solve a problem.
-
Develop — improve an idea by adding detail and refining it.
-
Justify — give valid reasons for your choice. …
-
- Written answer10 min
Design specification
Write 2-3 success criteria. Cover different parts of your strawbot — use these headings to make sure you don't just write about one thing:
- Movement / Function — What must it do? (walk forward? how far? straight?)
- Stability — Must it stay upright? Not tip?
- Joints / Mechanism — What must the joints and linkage do? Stay rigid? Turn the motor's spin into a walking step?
- Structure — Must it hold together while the motor runs?
- Size / Materials — Must it be buildable from straws, split-pins, card and 3D-printed parts? Any size limit?
The most important rule: at least one of your criteria must directly solve the problem you picked from your basic strawbot. If your basic one fell over, one criterion must be about staying upright. If it only shuffled, one must be about a proper walking step.
Sentence starters
"My advanced strawbot must ______ ."
"Because my basic strawbot ______ (my chosen problem), it must ______ ."
- Image annotate20 min
Your range of ideas
Photos of your 3+ concept sketches.
On every sketch, label:
- where the joints are,
- where the crank / linkage is (the part that turns the motor's spin into movement),
- how it moves, and
- how this idea fixes your chosen problem.
Look for: Each pin points at one specific feature and says something a designer could act on — not just 'looks cool'.
- Rubric shown to students
How this is marked
- Hand-in
Hand it in
4
Build V1Assessment
35 min · 6 activities
- The brief
Your task
What you're making Working with your partner, you will select one of your design ideas and build a first physical prototype — Version 1 (V1). Alongside the built outcome, you will document the entire making process as an ongoing record of your decisions, actions, and reflections.
Who it's for Your V1 prototype and process documentation are for your design teacher and your partner — evidence that you can move a design idea off the page and into reality, making thoughtful decisions as real-world challenges come up.
What you must include Your submission is the process documentation + V1 prototype together. Your documentation must capture:
- Which design idea you chose and why you chose it over the others
-
In-progress photos or sketches showing the prototype at key stages of construction
-
Notes on changes or problems encountered during making and how you responded to them
-
A short reflection at the end: what V1 achieves, what it doesn't, and what you would change in a next version
What a strong response looks like
- The process record tells a clear story — someone reading it could follow what you did and why, not just what …
- Photo or file upload15 min
Image of the design you chose
Upload your work.
- Process log10 min
Log what you made today — a photo and what you did.
- Written answer10 min
A short reflection
In 2-3 sentences, what V1 achieves, what it doesn't, and what you would change in a next version
- Rubric shown to students
How this is marked
- Hand-in
Hand it in
5
V2 Research
45 min · 3 activities
Lesson shape
Opening5 minMini-lesson10 minWork time25 minDebrief5 min- OpeningReading6 min
What 3D-printed parts can do that straw cannot
Your V1 strawbot taught you how straw structures fail in a race—now see what 3D-printed parts can fix.
Look at the three cards below. Each one shows a strength of 3D-printed parts that straw cannot do. As you research today, hunt for examples that use at least one of these strengths.
- Hold a precise shape under stress: Straw bends, cracks, and crushes. 3D-printed plastic holds its angle and doesn't snap when your robot hits a wall or speeds up.
- Fit parts together exactly: Straw joints are loose and weak. 3D-printed parts can have holes, sockets, and connectors designed to lock wheels, motors, and sensors in place with zero wobble.
- Be light and hollow inside: A 3D-printed bracket or wheel hub weighs far less than a solid block of straw bundled to be stiff. Less weight means faster acceleration and easier control.
Look for: You know which three superpowers 3D-printed parts have, and you can spot them when you find a design example online.
- OpeningExample sort6 min
Before you start hunting for ideas, let's check you know what kind of 3D-printed part is actually worth researching for a race robot.
Sort each example into the right column. Click an item, then click a column to place it. You get instant feedback — if you're wrong, read the hint and try again.
Look for: All items correctly placed, with no remaining wrong placements — showing you can judge whether a 3D-printed part improves speed, structure, or is not useful for a race robot before you start researching.
- Image annotate20 min
Add images of inspiration you find. Search for ideas to improve joints, stability or speed. You'll be able to upgrade all of these in the next step.
add 1-2 annotations per image about a)what about the image inspired you and b)anything else that stood out
6
Orthographic Drawing practice
45 min · 3 activities
Lesson shape
Opening5 minMini-lesson10 minWork time25 minDebrief5 min- OpeningReading6 min
The Three Rules of Orthographic Drawing
Before you start drawing, learn the three rules that make orthographic views clear and correct.
Look at each rule on the cards below. These are the standards you'll follow when you sketch your own orthographic drawings in this lesson.
- Three Views: Front, Top, Side: Always draw the same object from three fixed positions. Front shows what you see facing it straight on; top shows what you see looking down from above; side shows what you see from the right edge. Together, these three views tell the complete story of the shape.
- Projection Lines: Thin, light lines connect the three views so they line up perfectly. A vertical edge on the front view must align with the same edge on the side view using a projection line. This keeps your views consistent and easy to read.
- True Shape: Every view must show the actual size and shape of what you see from that angle — no distortion. If the front view has a rectangular face, draw a rectangle, not a slanted line. True shape is how the object really looks from each position.
Look for: You can name the three views and explain what projection lines and true shape mean.
- OpeningExample sort6 min
Training your eye to spot errors now means your own drawings will be more accurate when you start drafting.
Read each drawing fragment below. Decide: does it show correct orthographic practice, or is it a common mistake? Click the fragment, then click the correct column to place it. You will get instant feedback — use any wrong answers to sharpen your thinking before you draw.
Look for: All fragments placed correctly, with no remaining errors after reading the feedback hints.
- Work time3D drawing practice22 min
Orthographic Drawing Drill
Now it's your turn — the more views you sketch and check, the faster your eye for orthographic drawing gets.
Choose your difficulty level using the tier slider. For each 3D shape shown in isometric view:
- Sketch the front view, top view, and side view on your grid paper.
- Label each view clearly.
- Press "Reveal" to check your sketches against the correct answer.
- Note any view you got wrong, then press "New shape" and try again.
Work through at least three shapes before moving on.
Look for: You have sketched and self-checked at least three shapes, with all three views correctly placed and proportioned on your final attempt.
7
Design the part you'll 3D printAssessment
50 min · 6 activities
- The brief
Your task
What you're making You will design and 3D print an original part, documenting the full journey — from brief and research through planning, sketching, drawing, and decision-making. This is before the next step where you'll produce the finished printed object.
Who it's for Your design documentation is a professional record for a client or end-user who needs to understand exactly what your part does and why it looks the way it does. Clear, accurate communication of your design thinking is just as important as the part itself.
What you must include Your submitted portfolio/process folder must show evidence of each stage below:
-
Design brief — a concise written statement describing the part, its purpose, and the specific problem it solves or function it performs
-
Research & investigation — annotated notes, sketches, or references that informed your design decisions (materials, dimensions, existing solutions, etc.)
-
Concept sketches — 2–3 distinct concept sketches, each with annotations explaining the thinking behind that idea; these must be completed before you select your final design direction …
-
- Image annotate20 min
Concept Drawings with Annotations
Upload 2–3 designs. On each, drop a pin on a specific part and write one note about what works (or doesn't). Aim for 2+ pins per design, what you like or dont like
Look for: Each pin points at one specific feature and says something a designer could act on — not just 'looks cool'.
- Written answer10 min
Which one you chose
Which concept did you choose? Why?
- Image annotate20 min
Orthographic drawing
Your chosen idea completed on grid paper, drawn to a 1:1 scale, showing the top, front, and side views, with all key dimensions labelled.
Look for: Use annotations to add extra information about what your part does.
- Rubric shown to students
How this is marked
- Hand-in
Hand it in
8
Log into Tinkercad and do tutorials
45 min · 1 activity
Lesson shape
Opening5 minMini-lesson10 minWork time25 minDebrief5 min- 5 min
Copy this class code: (hidden)
You'll use it in the next step
9
Make your piece in Tinkercad and export
45 min · 1 activity
Lesson shape
Opening5 minMini-lesson10 minWork time25 minDebrief5 min- 5 min
Make your piece in Tinkercad
Now that you have designed your piece and have Tinkercad skills, model your piece in Tinkercad
The resources below include .stl files that you can import into Tinkercad to use in your design.
10
3D print your piece
45 min · 6 activities
Lesson shape
Opening5 minMini-lesson10 minWork time25 minDebrief5 min- 5 min
Follow the instructions to print
- Export from Tinkercad
- 5 min
2. Select everything and .stl format
- 5 min
3. Go to Fabrication menu at the top then 'New Submission'
- 5 min
4. select 3D Printer
- 5 min
- Upload your .stl file from Tinkercad to this space and then hit the 'upload and scan' button
- 5 min
6. Once it scans OK you can then submit
11
test and evaluateAssessment
65 min · 6 activities
- The brief
Your task
What you're making You are testing your strawbot and writing an evaluation of how well it works.
What you hand in
- Completed test results (data or observations from your tests)
- A annotated photo of your strawbot — label the parts that worked well and the parts that did not
- Written evaluation explaining what succeeded and what did not
- Any design changes you would make based on your findings
- Work timeTests25 min
Testing your strawbot now reveals which parts of your design actually work under real conditions — the data from today will guide your design changes.
Run your strawbot at least three times. For each test, record: what you were testing (e.g. straw strength, wheel grip, steering), how you tested it (method and conditions), what you observed or measured (data or description of what happened), and which prototype version you tested. Note any failures, unexpected behaviour, or successful moments.
Look for: You have recorded at least three separate test runs, each with clear method, observation, and prototype details — enough detail that someone else could repeat your test and understand what you found.
- Work timeImage annotate15 min
Use your test data and observations to pinpoint exactly what worked and what didn't on your strawbot — this visual map will ground your full evaluation.
Upload a clear photo of your built strawbot. Then drop labelled pins on the photo to mark specific parts: place green pins on parts that worked well during testing (the joints that moved smoothly, the structure that held firm, the straw angles that were effective), and red pins on parts that did not work well (joints that jammed, weak points, design features that caused the prototype to fail or move badly). For each pin, write a short note (2–3 sentences) explaining what you observed during testing and why that part succeeded or failed — link back to the actual test results and method you recorded.
Look for: A photo with multiple colour-coded pins, each backed by a specific, honest note that traces a design choice to a test outcome — showing you can spot cause and effect in your own build.
- Work timeWritten answer25 min
Now that you have tested your strawbot and marked up which parts worked and which didn't, write a full evaluation that explains your thinking and points toward your next design.
Write your evaluation in three sections:
What succeeded. Identify 2–3 features or parts of your strawbot that worked well during testing. For each, explain WHY it worked — connect it directly to something you recorded in your test data or observed in your annotated photo.
What did not succeed. Identify 2–3 features or parts that did not work as intended. For each, describe what went wrong and reference your test observations or photo notes to support your claim.
Design changes. Propose at least two specific changes you would make to your next strawbot prototype to fix the problems you identified. For each change, explain how it will improve performance based on what you learned from testing.
Look for: Your evaluation clearly links each success and failure to specific test data or photo observations, and your proposed changes directly address the problems you identified — not generic improvements.
- Rubric shown to students
How this is marked
- Hand-in
Hand it in